
I read some other DIY blogs on gel stain before I started this project. Most other blogs recommended General Finishes gel stain in Java; one sanded, one didn't (unwise! You need to sand or use liquid deglosser. Shortcuts in home improvement rarely - if ever - pay off!). And one used poly and the other didn't. The blogger that didn't use poly noted that the finish was wearing off... And honestly, that's the easiest part, so don't skip it, folks.
Here is how we started off:


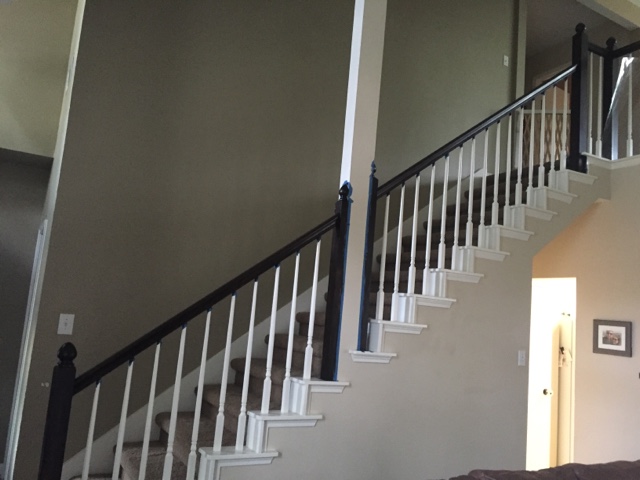
Hello, oooaaaakkk. Holy oakamole.
Oak is a strong and sturdy wood, and worth keeping, even if the typical honey stain isn't my favorite (I give preference to more modern, dark wood stains). Evidently, it would cost and arm and a leg to professionally restain oak, and is much more labor-intensive to do so than kitchen cabinets. The "easy" alternative is Gel Stain.
Now, the downstairs wood floors used to be engineered oak. They had water damage from a dishwasher leak and some parts of the finish were really worn out. When the floors matched the rails, it was fine. However, part of our purchase of this home included a credit to redo the floors, so we did that as soon as we moved in. I went with a wide plank, dark, engineered hardwood. And I love it. It's smooth, resilient, and easy to clean. (I actually enjoy that the dark floors show dirt because I know when they need cleaning!)
The stain that was recommended by the blog I read is the General Finishes Java Gel Stain. I can't figure out why it's called a stain. It should be called paint-stain, if anything. If you have ever use Annie Sloan paints, it gives that kind of coverage, minus the chalky finish. The only reasons I decided to use it were: a) I hated the oak and dark floor mismatch, and b) oak has a lot of grain, and its texture is visible through the paint/stain. This gel essentially covered the variations in the grain of the wood. In other words, it looks like it was painted in some lights. from a distance or in dim light, it does just look like a dark stain. I don't regret using it, but if you're considering it, you should know what you're getting into.
This java gel stain color was HIGHLY recommended. I would've preferred to purchase locally but I couldn't find any home improvement stores that were carrying the stuff, so I ordered on Amazon like everyone else. The color is really, really dark. We have dark floors, and this is darker. I'm fine with it because it looks fine (our living room isn't well-lit, anyway). And because the dark color gives great coverage. But if you want it to match, hunt around for another color; I doubt your floors are that dark.
If I haven't scared you off, this is what you'll need:
- liquid deglosser
- painters tape (wider than 1" suggested)
- several cheap painter's rags
- 4 foam brushes
- GLOVES (and totally covering yourself - the stain is unforgiving on skin)
- gel stain
- rub on polyurethane (AKA poly)
- goof off (I'm a messy painter)
1) TAPE. Tape everything. So much tape. Tape down a mat under where you're staining! I didn't do this, and I should've.
I did tape each of the balusters and around the walls and trim. Thicker tape for the balusters would have been wise.
Time: 3 hours (I'm meticulous.)
2) DEGLOSS. I rubbed the bannisters drown with deglosser instead of sanding to help the stain take. You're supposed to be able to just put the gel over poly, but I don't recommend that: if it sounds too good to be true, it probably is. Roughing it up WILL help the stain stick. Plan to go over the entire wood area twice, if not more. You're removing the poly shine (hence, deglosser) so it should be dull. This dries quickly and you can go over it multiple times very quickly. This is not smelly, fortunately. Everything else is :)
Time: 2 hours
3) STAIN: 2-3 COATS. Be prepared for multiple coats. You cannot do just one. You will not cover it all. You can use either foam brushes, old socks, or the cheap painter's rags. I tried the rag but decided the foam brush was less messy and easier to control, so that was my preference. This does have some smell so open the windows! You have to let the stain dry 12-24 hours, and 24 seems to let it set better. I tried after 12 and actually wiped some off. After the 3rd coat, wait a couple of days (48h) for the gel to harden before applying poly. Avoid touching it - don't take the risk, even after two days. You don't want to smear it or get it on your skin. It's a bear to get off!
Time: coat 1 = 2 hours; coats 2 & 3 = 30 min - 1 hour. ~4 hours total
4) POLYURETHANE. This is super easy. I used a painter's rag and wiped it on in the direction of the grain. It's recommended that you do two coats, bc it does go on thin. DO NOT SAND BETWEEN COATS. Gel stain is not like other stains. You WILL sand it off. The poly dries fast so wait just a couple hours before doing there second coat. I did touch ups to the gel between coats as well.
Time: 1 hour

Donezo! At this point I did some touch ups on the trim and walls that I got stain on, and then I put the plastic barrier back up. (Another problem with our railing is that the balusters are too far apart to be safe for kids - they were built in the early nineties, so our kids can put their heads through. Because we like them, we put up some plastic sheeting from Amazon to keep them - and toys - upstairs.)

Stick a fork in me, I'm done. With two kids, this took me about a week, working on it on nights and weekends, including taking breaks from working on it so it could dry. I love the way the living room looks downstairs now, and I really feel like this pulls in some of the darker playroom furniture!
xo
Elizabeth
No comments:
Post a Comment